

|
|
|||||||
|
|
|
|
|
||||
|
|
|
|
|
|
|
||
|
|
|||||||
|
|
|||||||
|
 |
 |
METAL TEXT |
| In this tutorial you will learn how to create metallic text like the one above, let's start with a 500x500px document at 72dpi. RGB set the backgorund color to any color you want, I picked a neutral gray #666666 because I will use white for the text. If you have trouble viewing the images just click them to see a larger view. |
 |
 |
Now press the letter "D" to reset your swatches and then the letter "X" to swap them, now select the Type tool and type anything you want, try to use a Serif font like Times of Palatino at a size of at least 100pt, for this example I used the font ATCLaurelBlack at a size of 150pt. |
 |
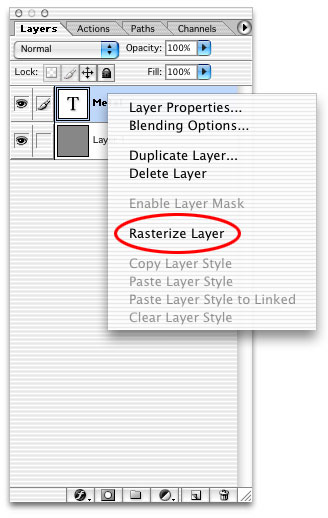 |
Then Right Click (PC) or Cmd+Click (Mac) on your type layer and select "Rasterize Layer" from the flyout menu. |
 |
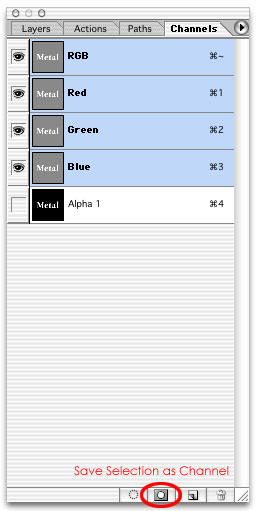 |
Now Ctrl+Click (PC) or Cmd+Click (Mac) on the rasterized layer to make a selection from it, click on your Channels palette and then on the "Save Selection as Channel Button" this will create a new channel with your selection filled, Photoshop usually names this channel Alpha 1. |
 |
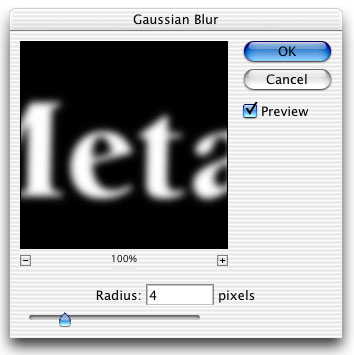 |
Click on the Alpha 1 Channel to select it, then press Ctrl+D (PC) or Cmd+D (Mac) to deselect, then go to Filter>Blur>Gaussian Blur and apply a 4px. blur (you can change this setting to get a different effect) |
 |
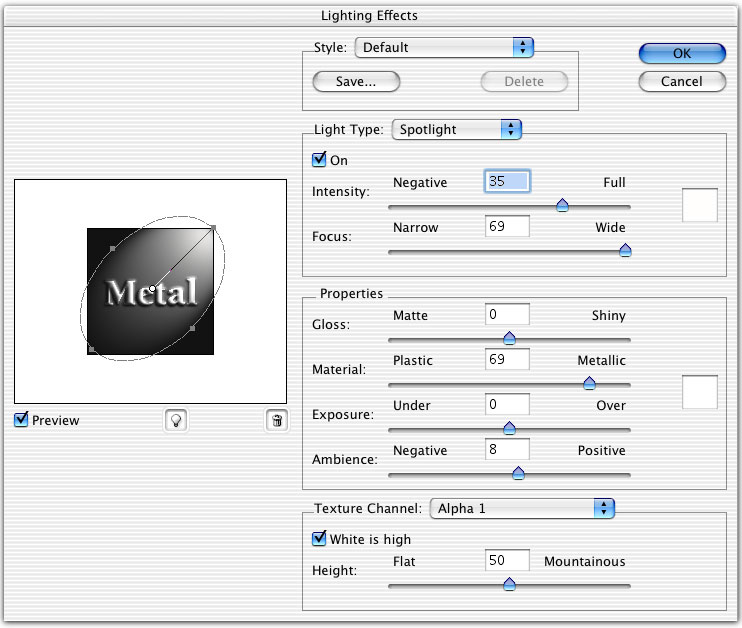 |
Then click back on your Layers pallette and go to Filter>Render>Lighting Effects and make sure your settings look like this. |
 |
 |
Now you should have something like this. |
 |
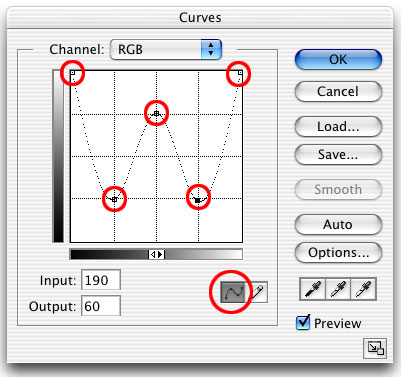 |
Go to Image>Adjustments>Curves, Ctrl+M (PC) or Cmd+M (Mac), and make your graph look like this by clicking and dragging. |
 |
 |
In the end you should have somethig like this. |
 |
 |
To achieve the final effect I just added a 2px. black stroke and a drop shadow using the layer effects, play around to see what you can get |
